Step 1, Getting Nextiva SIP Information.
- For administrators, log in to the NextOS Portal by going to www.nextiva.com and selecting Customer Login from the top right corner. Enter your login credentials and click Sign in. SelectSites & Employees then click on Login under the Admin Login column. Click Users and search for the employee whose information you wish to edit. Click Edit.
For users, log in to the Customer Portal by going to cp.nextiva.com. - Click View & Edit Devices, then select Add New Device.
- Click on Bring Your Own Device.
- From the Device Type drop down menu, select Generic SIP Phone then click Continue.
- From here, you will need to assign the Generic SIP Phone to an employee. Click on Sites & Employees. Then click on Employees.
- Click Edit next to the employee who you wish to assign the phone.
- Click Assign New Device in the Assigned Devices field.
- From the Device drop down menu, select Generic SIP Phone. Then click Generate next to the Authentication Password. Write down the SIP Username, the Authentication Name, and the Authentication Password (you will later enter these into the soft phone), then click Submit.
Step 2, Fill in the Nextiva SIP Account on Ecsow Dialer.
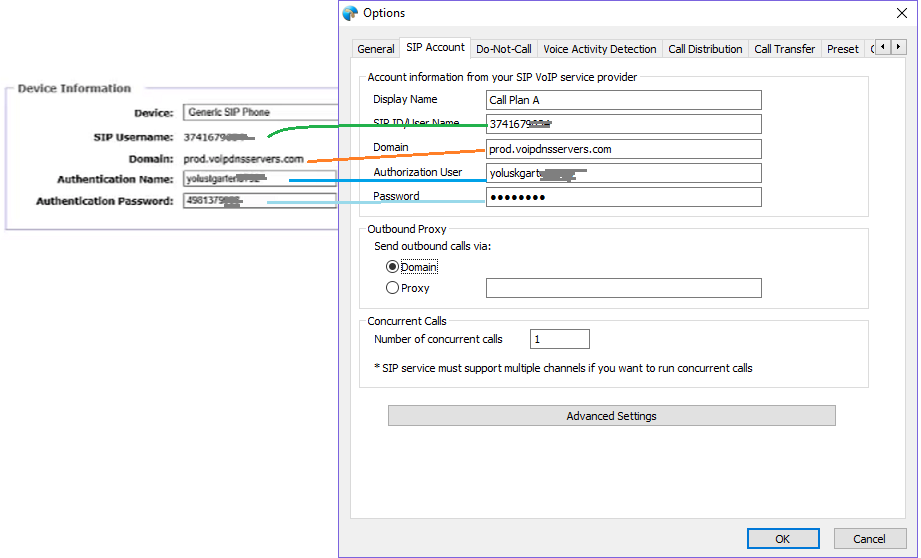
(Notes: You may need to set Send outbound via: Select "Proxy ," and input prod.voipdnsservers.com:5062 )
Click OK button to apply the settings.