Downgrade Skype to 7.4 / Disable Skype Auto Updates
If you want to use Skype for the phone service, we recommend to use the Skype version 7.40 or older version. please refer to the below information To Disable Skype Auto Updates Permanently.
Step A: Downgrade Skype to 7.4
1, Please uninstall the currently installed Skype from the control panel.
2, Download the Skype Setup 7.40 from our website here. Then install it on your computer.
3, Run Skype and navigate to the Tools Menu and select “Options”.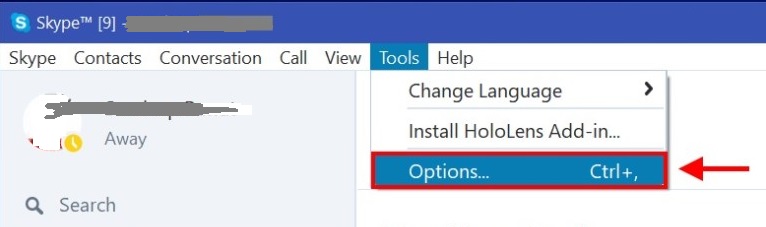
4, All of the Skype options will appear on your screen. From the left pane, select “Advanced”.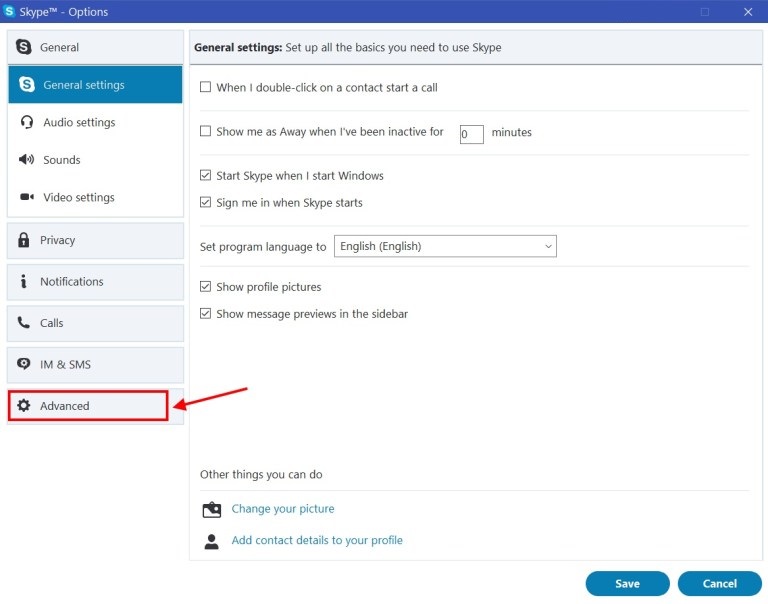
5, Under Advanced, select “Automatic updates” then, go to the right side and click on the button “Turn off automatic updates”. Finally, click on “Save” button given right bottom. Important: “Automatic updates” option has been removed from Skype version 7.41 or later. If you wish, you can download Skype version 7.40 from here. 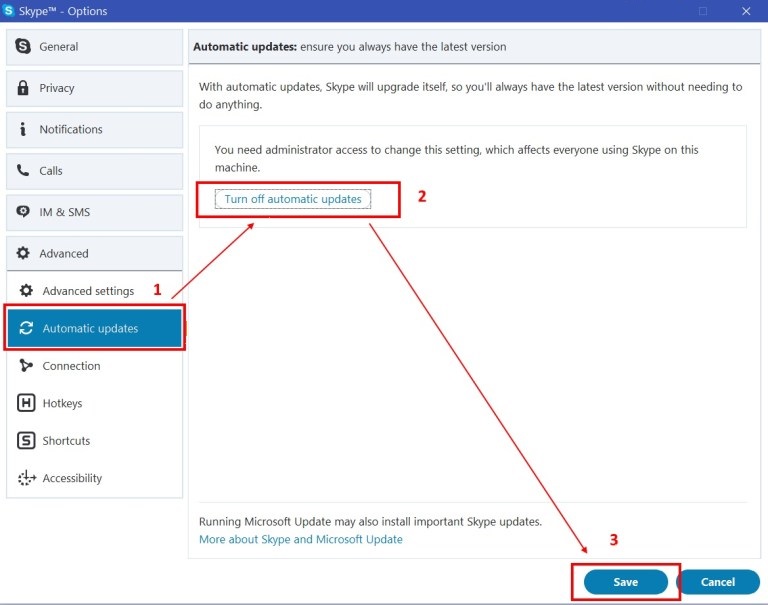
Step B: Delete Skype auto updates service
1, Now, for further steps we need to stop the running Skype. Sign-out Skype desktop app, then, quit from the notification area. Check the image below: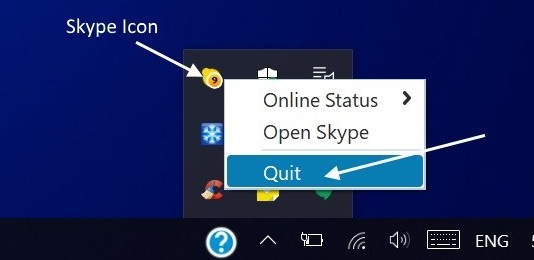
2, Now, open command prompt as administrator. Go to Windows Search, type “cmd”. It will show you the search result, right-click on “Command Prompt” and select “Run as administrator”.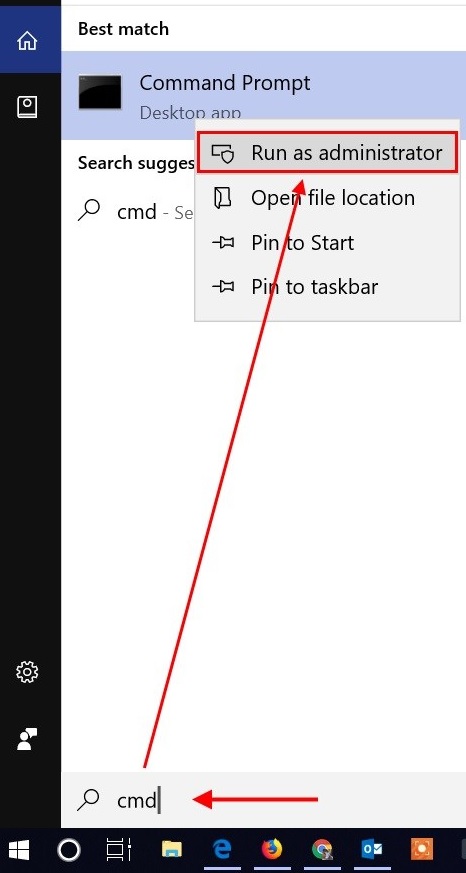
3, The command prompt will open on your screen. Type, sc delete SkypeUpdate and hit Enter from your keyboard. On the next line, you will see the message of SUCCESS. Close command prompt screen.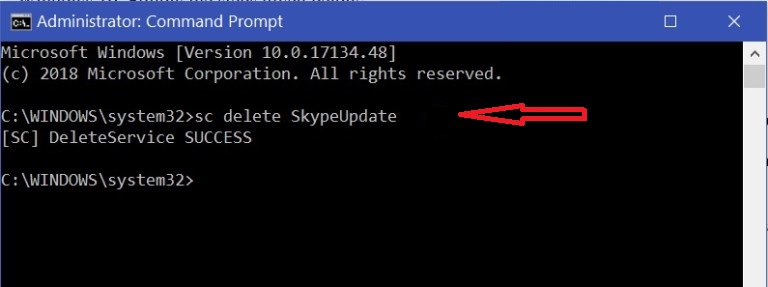
4, Press “Win + R” to open Run dialog box. Once open, type %temp% and hit OK. This will open the Windows Temp folder for you.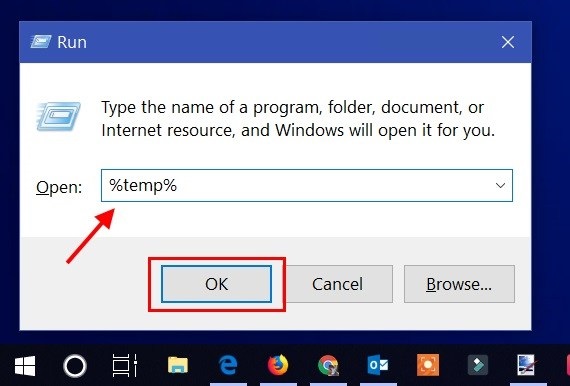
5, Locate “SkypeSetup.exe” and use hotkeys “Shift + delete” to delete this file permanently from your machine. Then, close Windows Temp Folder.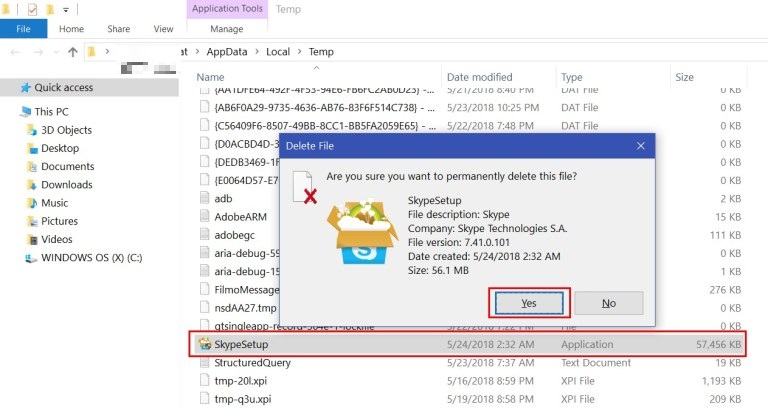
Step C: Disable Skype Auto Updates Permanently with Registry Editor
You can simply block Skype update by merging the registry. Download the disable Skype update file from here. Then right click the downloaded "disable-skype-update.reg" file to select "Merge" menu.
Or
1, Now the most important part comes here. We have to add registry value in order to prevent Skype to check version updates. Before we make changes in Windows registry, we highly recommend you to back up your registry.
To open Registry Editor, press “Win + R” to open Run dialog box and type, “regedit” and hit OK button.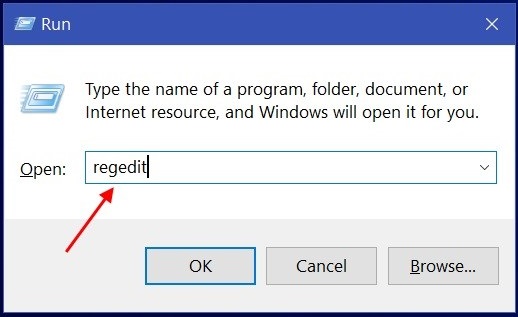
2, Once Registry Editor open, follow the given path: HKEY_LOCAL_MACHINE\SOFTWARE\Policies. Then, right-click on “Policies” and select New -> Key -> type Skype on it and hit enter. By doing this, Skype is added under Policies.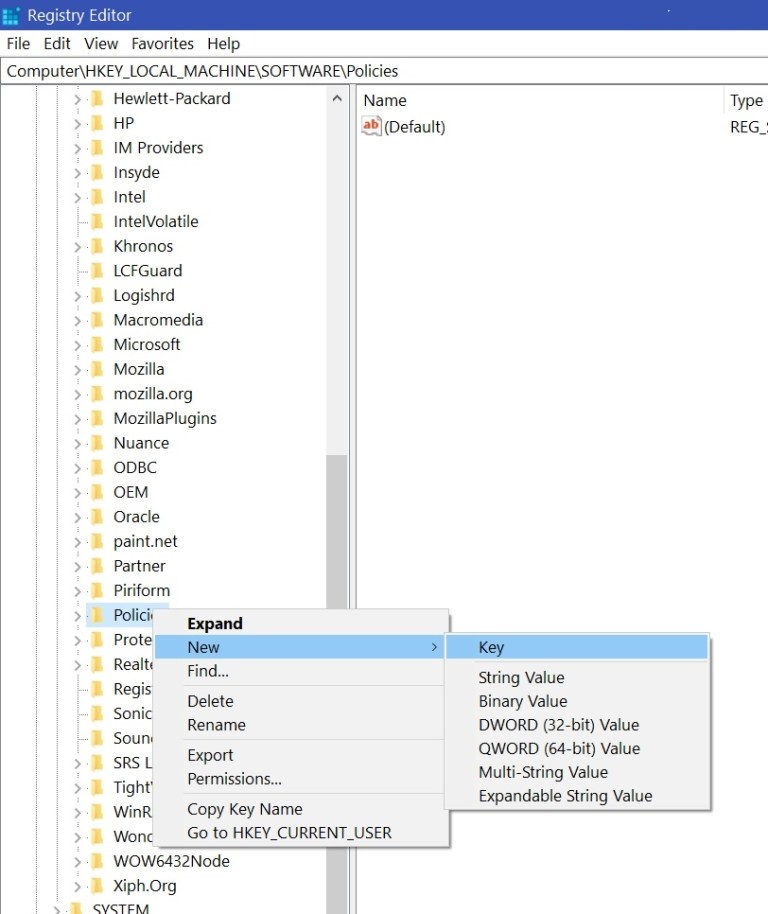
3, Now, right-click on created Skype and select New -> Key -> type Phone on it and hit enter. By doing this, Phone is added under Skype.
4, While Phone key is selected, go to the right side and right-click anywhere and go to New -> DWORD (32-bit) Value. A new string is added with name “New Value #1”.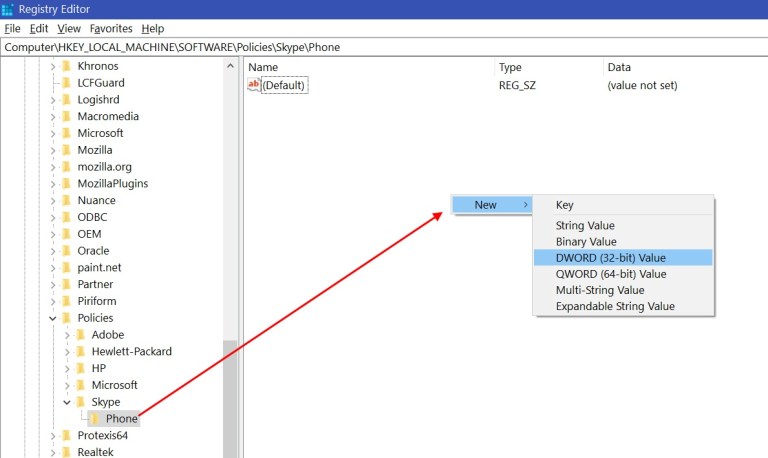
5, Right-click on New Value #1 and rename to DisableVersionCheck.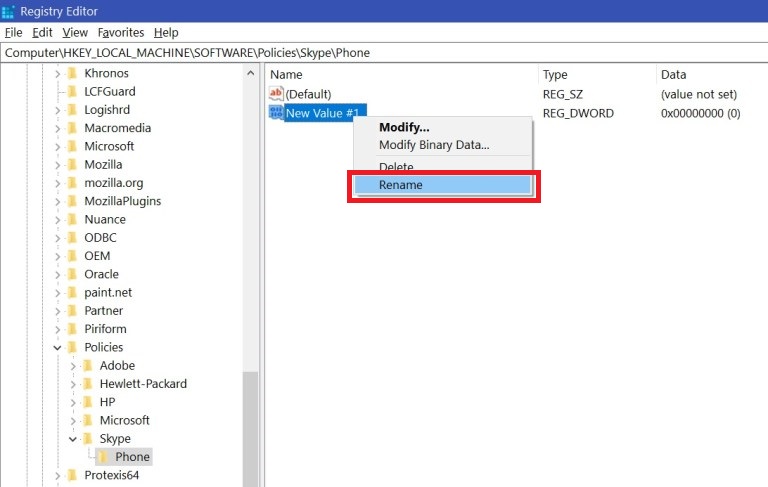
6, Now double click on DisableVersionCheck and change Value data: from 0 to 1 and click OK to close. Then, you can close Registry Editor.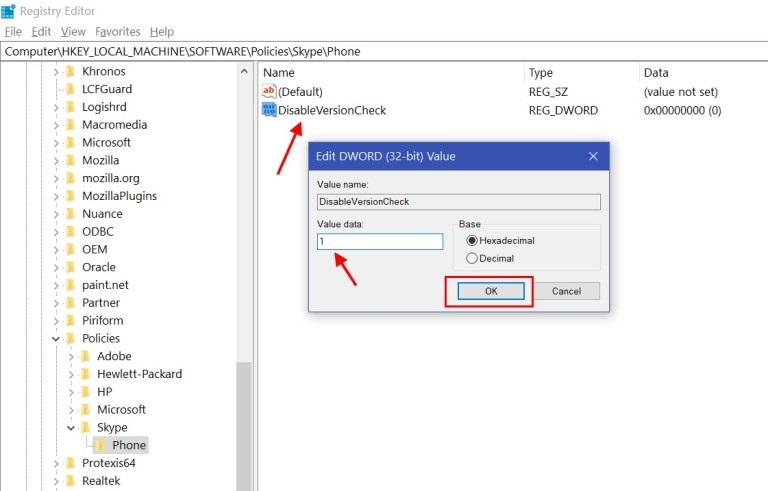
Finally; you just need to restart your Windows computer once so all the settings we have made will be in effect. Once your computer has rebooted and come back, launch Skype desktop app and sign-in with your username and password. By doing all the settings we have permanently disabled Skype auto update settings. This is the way you can disable Skype auto updates.